Introduction:
The “Add/Manage Employees” section of our EMR software is a crucial tool for practice owners and admins. It allows for comprehensive management of team members, including adding new employees, adjusting their roles, and customizing their permissions within the system. This guide will walk you through the steps to efficiently use this feature, ensuring your practice runs smoothly and securely.
Accessing the Add/Manage Employees Section:
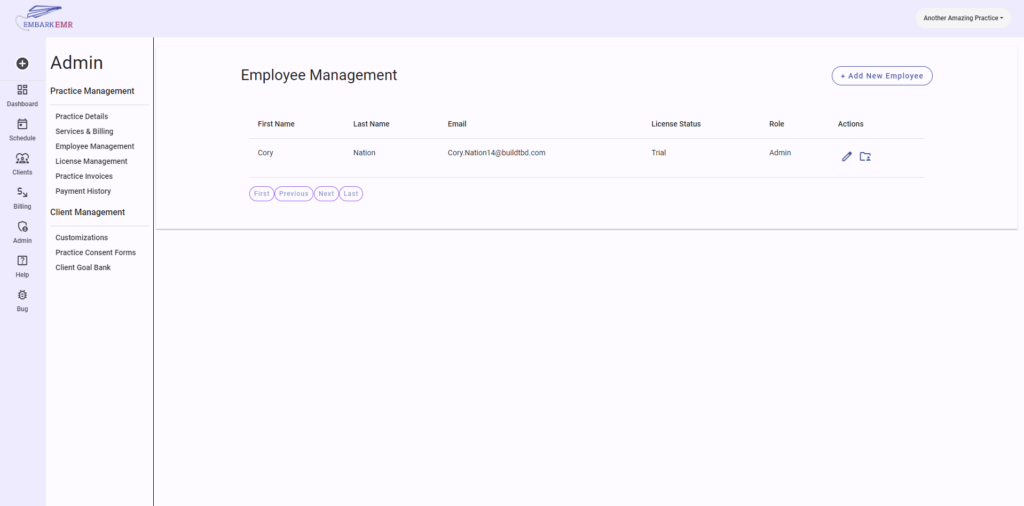
Access the Admin section by clicking “Admin” in the left hand main menu, then click the Employee Management tab. Only users assigned the role of Practice Owner or Admin have the authority to access this page. This ensures that employee management remains secure and is handled only by authorized personnel.
Adding a New Employee:
- Navigate to the Add/Manage Employees Section: Locate and select the “Add/Manage Employees” option from your dashboard or menu to open the employee management area.
- Initiate the Addition of a New Employee: Click the “+ Add New Employee” button located in the top right corner of the page. This action will bring up a form to enter the new employee’s details.
- Complete the Employee Form:
- First Name and Last Name: Enter the employee’s legal first and last names to ensure proper identification within the system.
- Email: Provide the employee’s email address, which will be used for system logins and communications.
- Role: Select the appropriate role for the new employee from the options available (Biller, Employee, Admin). This role will define the base level of access and responsibilities the employee will have.
- Permissions: Set specific permissions based on the role and necessity within the practice. Options include:
- Access to Client Information: Determine if the employee should have the ability to view or manage client records.
- Access to Financial Information: Decide if the employee should have access to billing, payment information, and other financial data.
- Allow to View Everyone’s Calendar: Grant permission to view scheduling details across the practice if necessary for their role.
- Submit the Form: After filling out all necessary fields, review the information for accuracy and click the submit button to add the new employee to your system.
Managing Existing Employees:
- View Employee List: Within the same section, a list of current employees will be displayed. Each listing includes basic information and options to edit or remove as needed.
- Edit Employee Details: Click on an employee’s name or the edit icon next to their listing to update their information or adjust their permissions.
- Remove Employees: If necessary, employees can be removed from the system by selecting the delete option associated with their listing. Confirm the removal to ensure that access is securely revoked.
Conclusion:
Managing employees effectively is key to maintaining the operational integrity and security of your practice. The “Add/Manage Employees” section provides a centralized platform to handle all aspects of employee administration, from onboarding new staff to adjusting roles and permissions as your practice evolves. Ensure you regularly review and update employee details to keep your practice management seamless and secure.
Reminder: Always ensure that changes to roles and permissions are made thoughtfully, keeping in mind the privacy and security of your practice’s sensitive information. Regular audits of employee access can help prevent potential security breaches and ensure compliance with healthcare regulations.